
You are here
Deploying a Server on AWS
This document goes through setting up a Linux instance (VM) on Amazon Web Services.
It is assumed the reader
- Has some experience with Linux
- Know how to SSH in to a server using keys
- Already has an AWS account
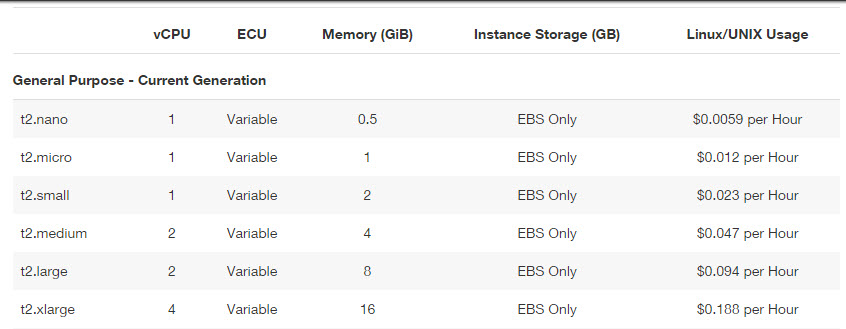
Before we proceed lets look at costs, as of this writing, for the Oregon location of AWS here are the instances I usually use. For classes, I use the micro instance, but this documentation is taylored for an MQTT instance with VPN access, so a nano instance would suffice. There are other costs involved like storage and data costs. So take those in to consideration. But in this case, I would be surprised if my total costs exceeds .25 (that's a quarter) since this will not exist for more than a day.
First thing is to log in to your dashboard, go to ECS and create an instance. This is synonimous with creating a VM, building a virtual machine etc.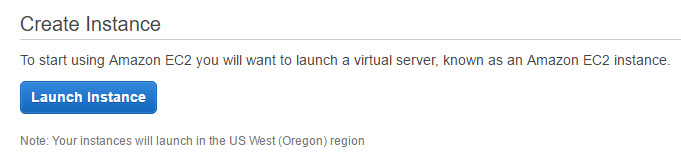
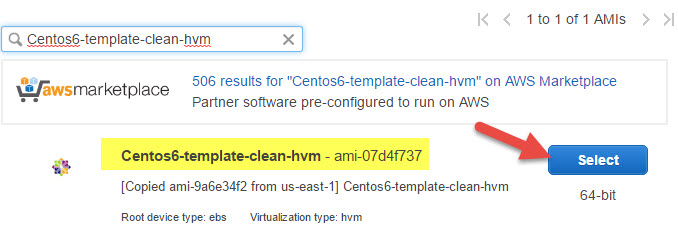
You can select any image you want, I like CentOS 6 images because I am familiar with them. the CentOS6-template-clean-hvm image is one that you can use the nano size.

Search for it and select it.
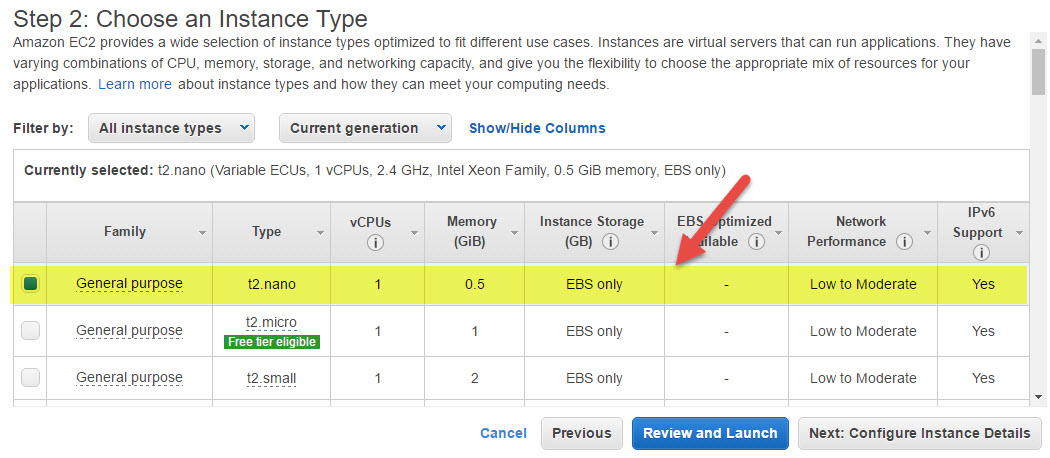
In this instance I will size it as a nano instance. This will cost me less than a quarter a day.
In Step 3 I do not usually configure much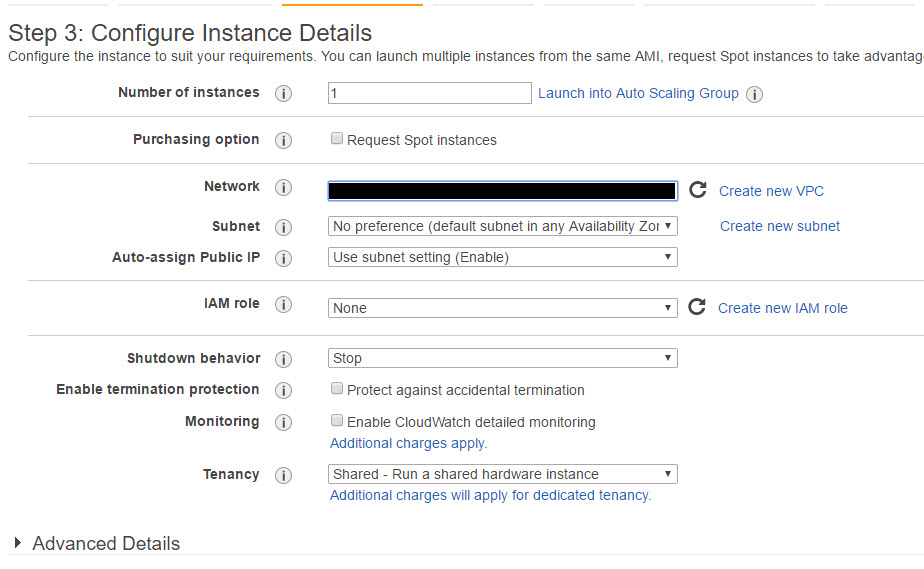
In step 4 I add storage, I stick to magnetic because it is cheap AND there will be low disk access, so it costs 0.05 per month per GB, but if you go SSD it still will only cost you $0.10 per month per GB, so the 15GB below would be $1.50 if I kept it the month as SSD, 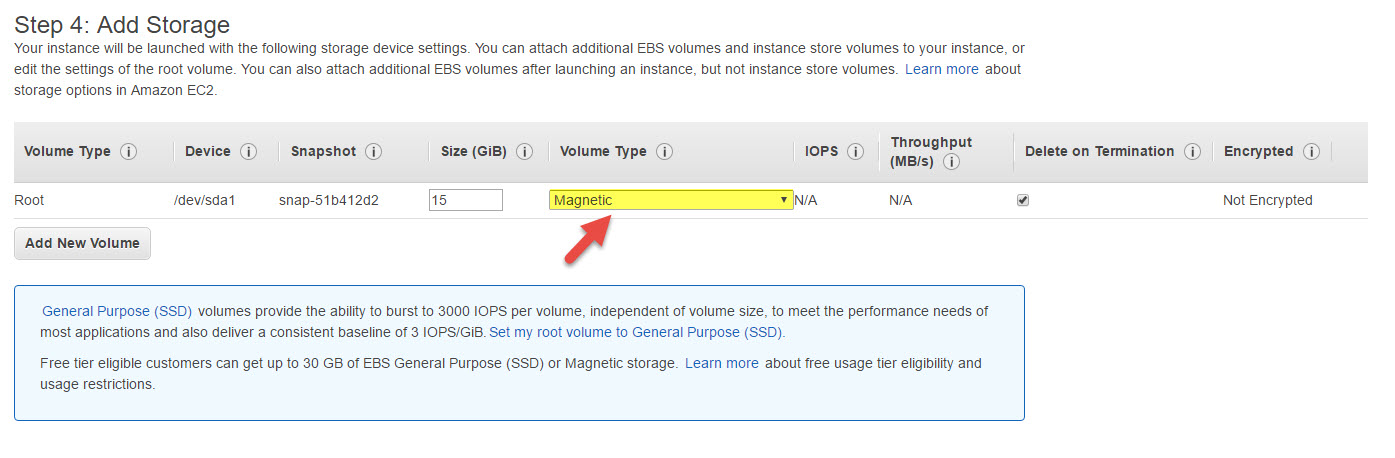
Personally I do not add much for step 5, something descriptive would be nice.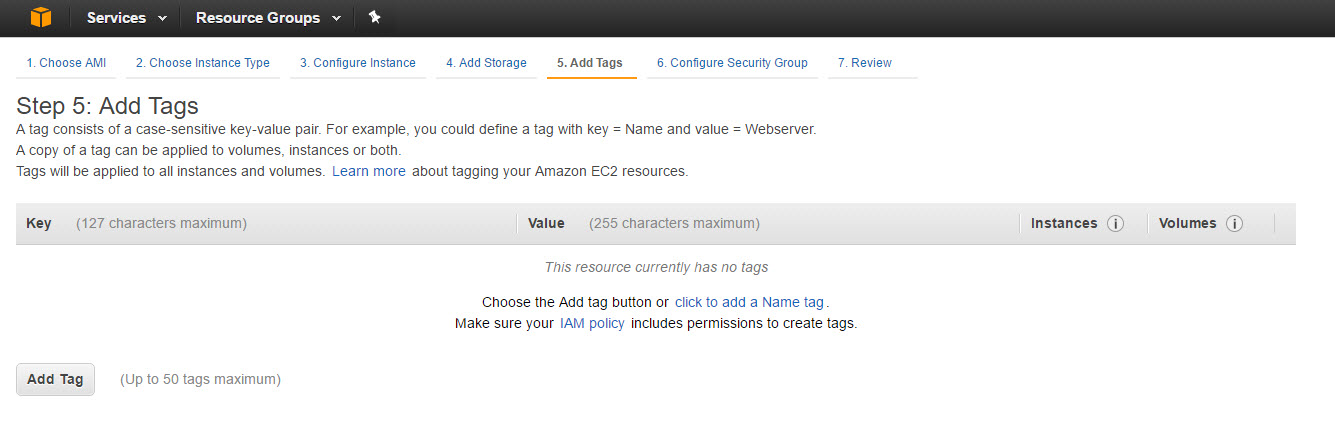
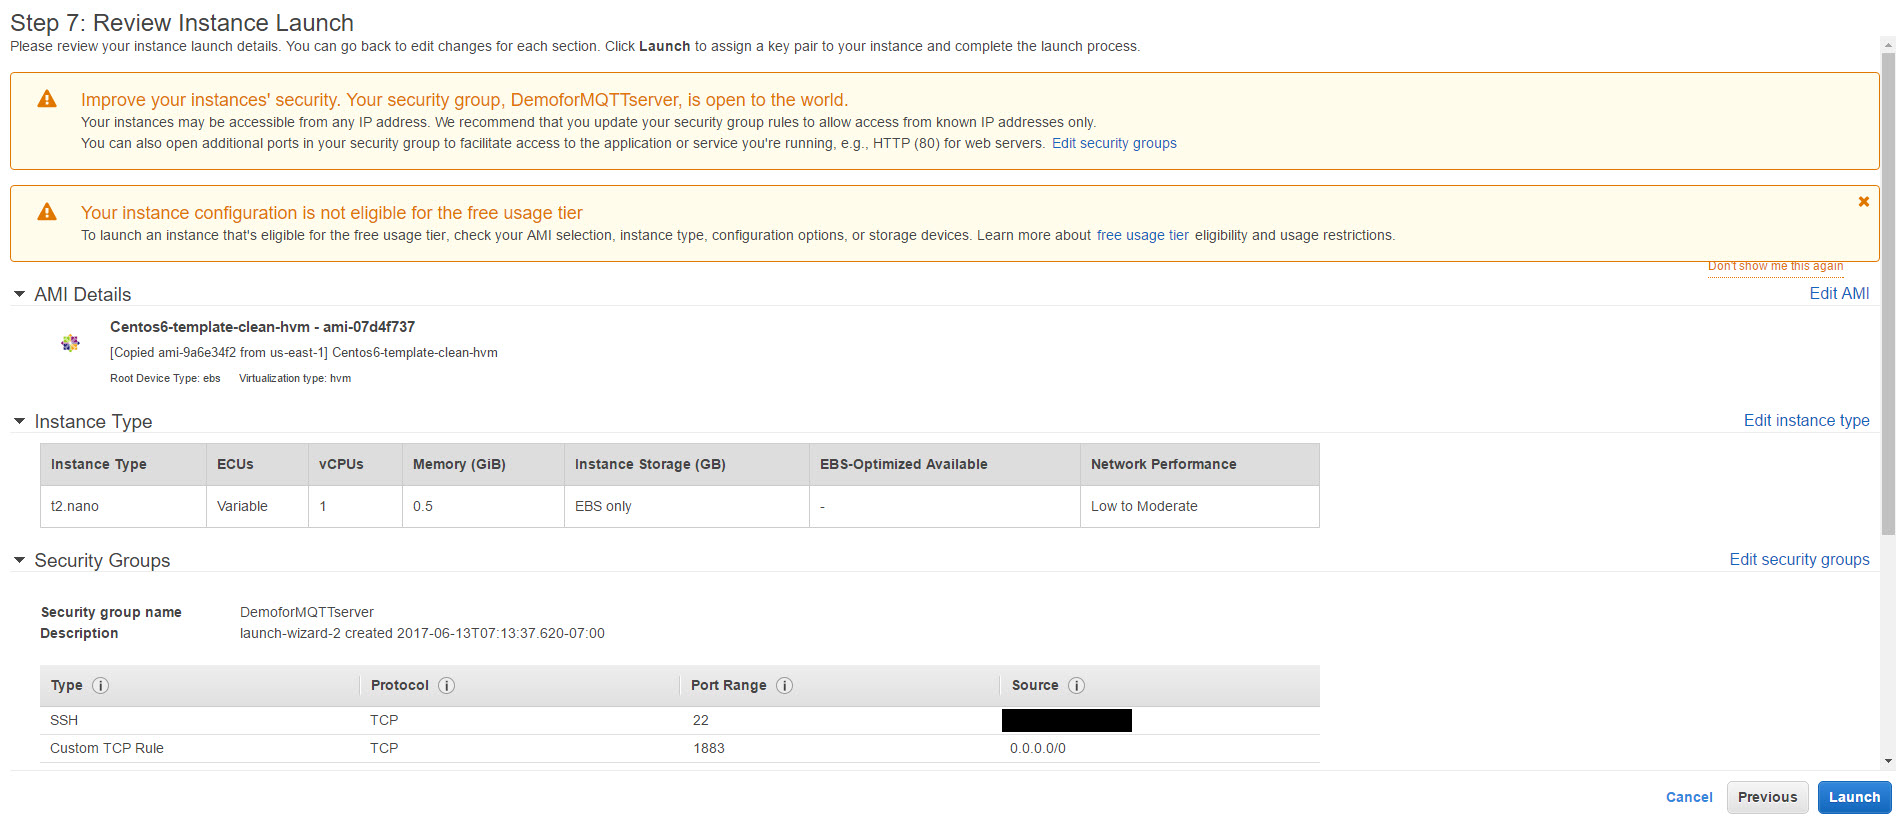
This is an important part, you need to open a hole (like port forwarding) from the Internet to your server. In the example below I do open up SSH, but only to my ip address at home (it has been redacted here), but the other services 1883 and 8883 are ports needed for MQTT, and 1194 TCP/UDP is used for openvpn.
If this was a web server I would open up 80 and 443, if it accepted mail 25. Depends on your application.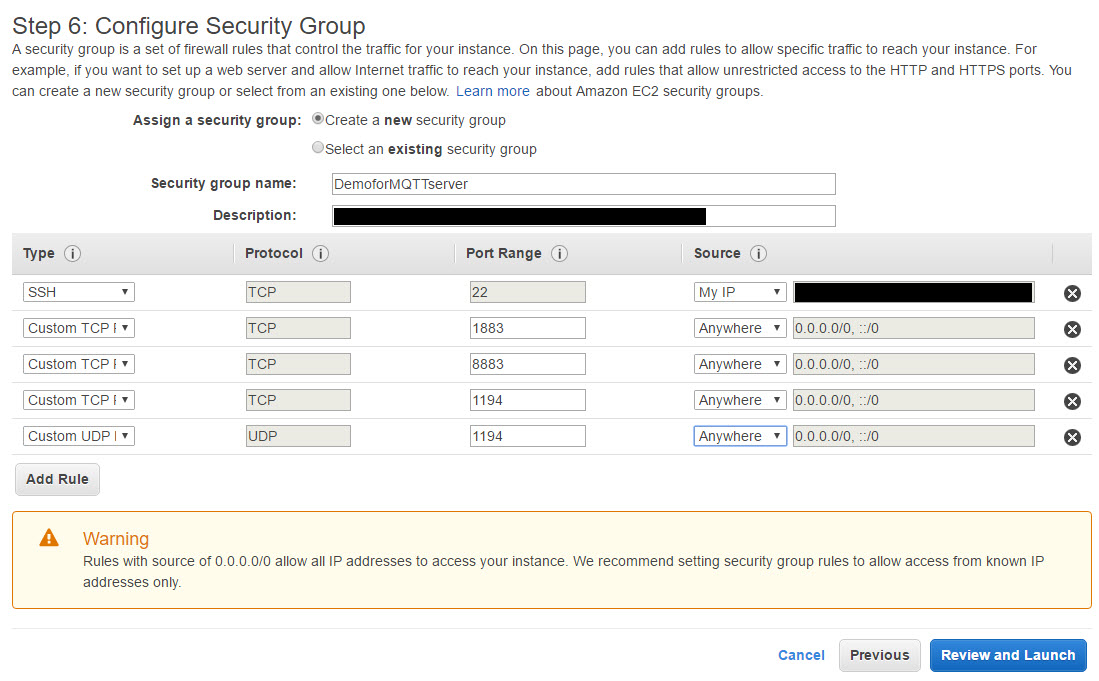
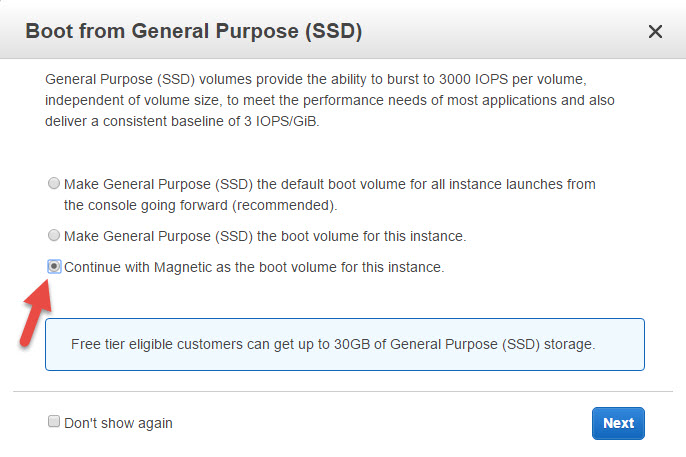
Here I stick with using a magnetic drive as the boot drive.
Almost done, just review your settings and launch the new instance.
You initially access this instance via SSH, in this example we will be using putty, if this is your first time create a public/private ssh key pair. You can use an existing one as well. But you will be using the private key to access the server.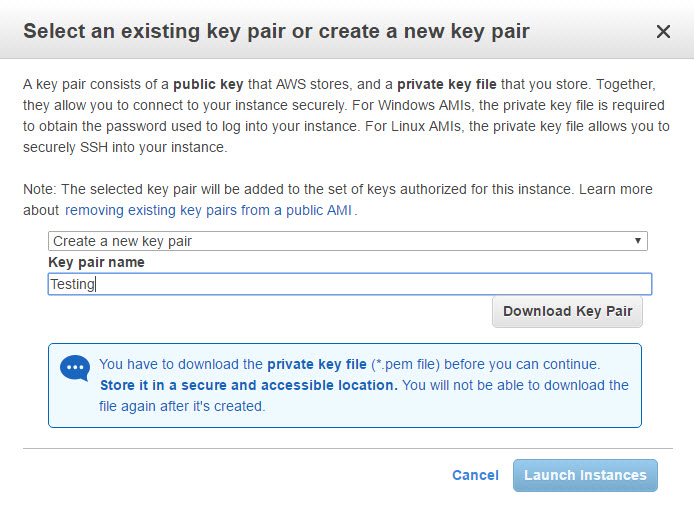
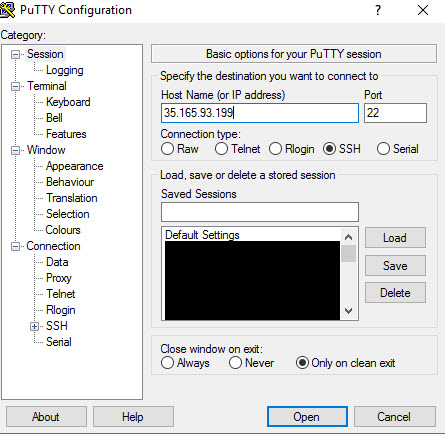
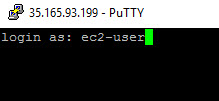
After a few minutes you should have a running instance on your dash board. In this exampel it shows the IP address as 35.165.93.199. You can use something called an EIP if you need a more permanent (static) ip address.
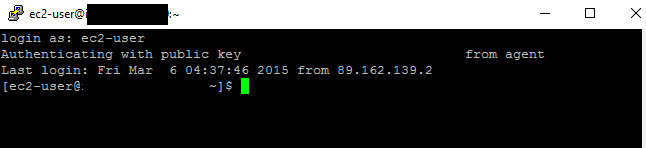
You should be able to launch your SSH client and access it, here is a putty screen shot. Normally you would load the putty key into paegent so you can log in to your instance. If you do not do this you will not be able to log in. There is no password to log in, it is all key based for the initial setup.
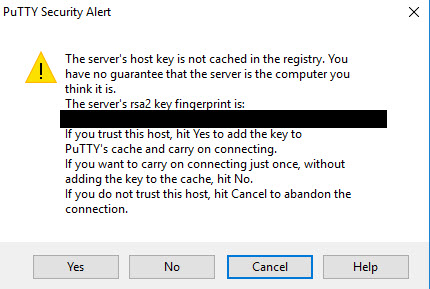
On first connection it is normal to get a security alert such as this.
The default user for this instance is ec2-user.
Once again log in is done initially via SSH key not password.
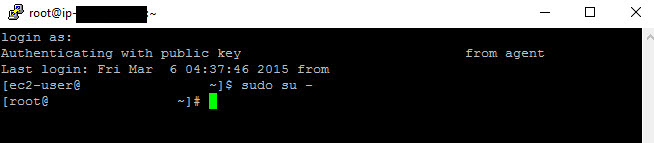
As the ec2-user you can simply sudo su - in to root and have full access to the instance
We are done here, other documents will come along on setting up the MQTT and VPN portions of this.
Theme by Danetsoft and Danang Probo Sayekti inspired by Maksimer