
You are here
Gamepad To Run Commands on Pi
I want to build a kiosk style system on a Raspberry Pi where you can press a button a command gets executed like omxplayer to play a video, qiv to display an image, or even display a web page.
I could tie in to the GPIO ports but I was thinking a faster way may be to use a gamepad and its buttons.
I looked around and most of my web search efforts pointed to gaming on the Raspberry Pi, which makes sense, but that is not what I wanted. But I did come accross an older than a decade daemon called joyd
In this doc I will go through installing it and configuring it on a Raspberry Pi.
The build I did was on a stock raspberrian image (2013-02-09-wheezy-raspbian.img) with nothing else added, not even patched.
I did this mostly using the pi account where the only time I had to sudo was for the make install command.
First download the files
wget http://www.cgarbs.de/stuff/joyd-0.2.2.tar.gz
wget http://www.cgarbs.de/stuff/joyd-fix-build.patch
tar xvf joyd-0.2.2.tar.gz
cd joyd-0.2.2/
patch -p1 < ../joyd-fix-build.patch./configure make sudo make install
- look in /dev/input for a js0 device
- Run dmesg after plugging it in to see if your gamepad is recognized
- or run lsusb to see if it is detected

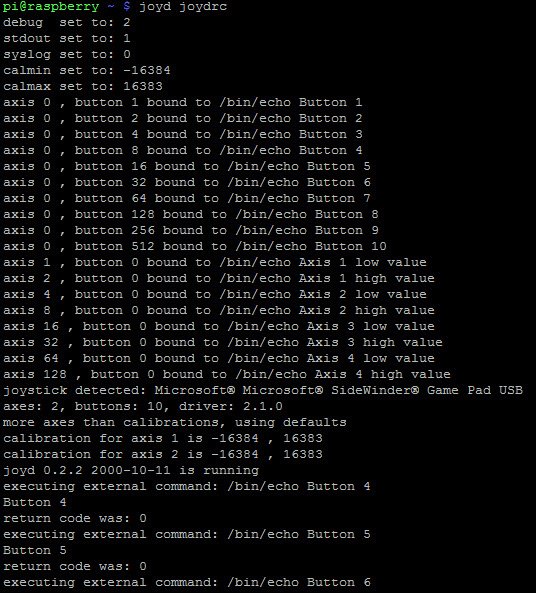
Now to test out joyd, copy a sample joydrc config file over to your home directory
cd
cp /usr/local/doc/joyd/joydrc .
Modify the file,
#
# sample configuration file for joyd
#
# This helps you to find out the numbers of your buttons and axes.
# Use ctrl-c to quit joyd.
#
[general]
# Some general settings
device  /dev/input/js0
daemon  0
debug   2
stdout  1
syslog  0
calmin  -16384
calmax  16383
[actions]
# These are the buttons that can be pressed
0       1       /bin/echo Button 1
0       2       /bin/echo Button 2
0       4       /bin/echo Button 3
0       8       /bin/echo Button 4
0       16      /bin/echo Button 5
0       32      /bin/echo Button 6
0       64      /bin/echo Button 7
0       128     /bin/echo Button 8
0       256     /bin/echo Button 9
0       512     /bin/echo Button 10
# These are the axes
1       0       /bin/echo Axis 1 low value
2       0       /bin/echo Axis 1 high value
4       0       /bin/echo Axis 2 low value
8       0       /bin/echo Axis 2 high value
16      0       /bin/echo Axis 3 low value
32      0       /bin/echo Axis 3 high value
64      0       /bin/echo Axis 4 low value
128     0       /bin/echo Axis 4 high value
joyd joydrc
- I tried several gamepad devices, most worked, I had one not work, a Saitek but I think it was broken.
- You will get better results with a powered USB hub
- The normal pi user should be part of the input group which has permissions to the /dev/inputjs0 device.
Theme by Danetsoft and Danang Probo Sayekti inspired by Maksimer